Alert Channels
An Alert definition includes Conditions, Notifications and Pipelines. When the conditions are met, one or more Notification Channels and/or Pipeline Channels are invoked.
Notification Channels
Qualdo currently supports the following Notification Channels:
Email
Email notifications require one or more recipient emails to be configured in a Notification Channel. Email notifications will be sent when the Quality Gate or Custom Alert threshold is met.
From the Alerts menu, click the Notifications Channel Tab
Select Email from the notifications list.
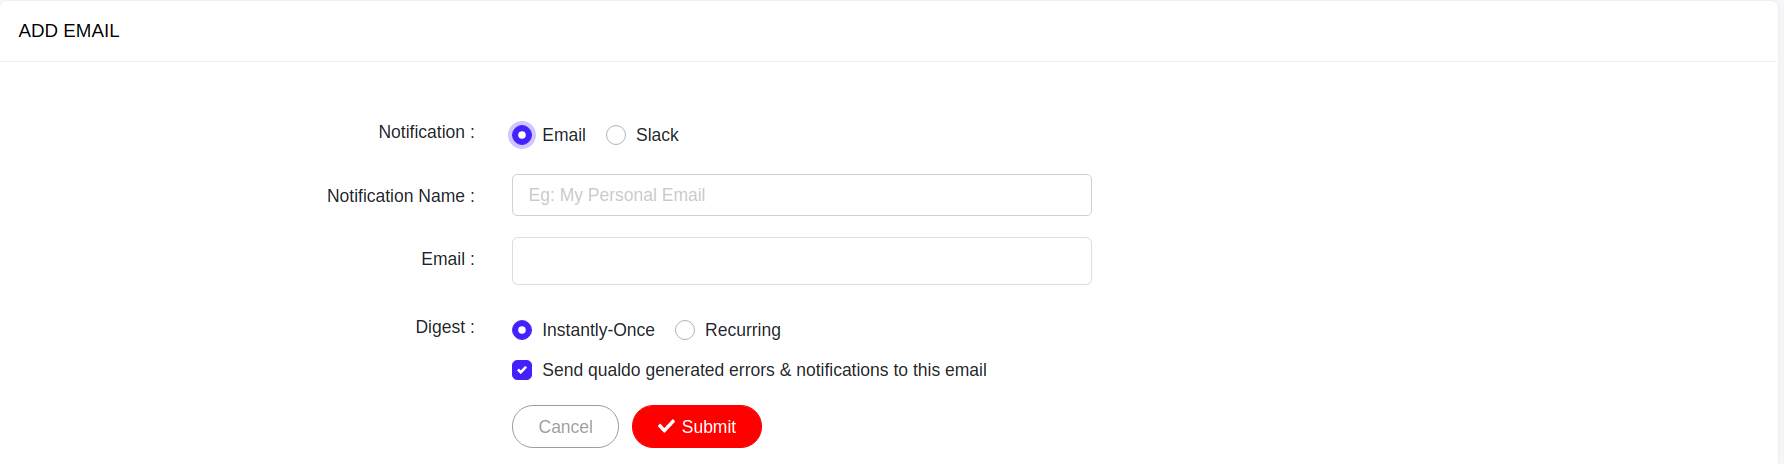
- Fill in the fields as follows:
Notification Name - Email notification name.
Email - Email address.
Digest - Instantly-Once/Recurring - Choose whether emails are sent immediately or according to a schedule.
Schedule - Select the schedule interval for the notification if the Digest is Recurring.
Check Send Qualdo generated errors & notifications to this email if this Notification Channel should receive system generated digests.
Click Submit to save the configuration.
Note
A default Notification Channel will be created with the registered email at the time of account creation.
Slack
A Qualdo Notification Channel can integrate with a basic Slack app via the associated Slack access token. Refer to Slack’s Basic app setup for guidance. Make sure the access token is integrated with the channel which you are going to configure in Qualdo as a slack notification channel. Once your Slack app, access token and channel are prepared, configure the Notification Channel as follows:
From the Alerts menu, click the Notification Channels tab
Select Slack from the notifications list.
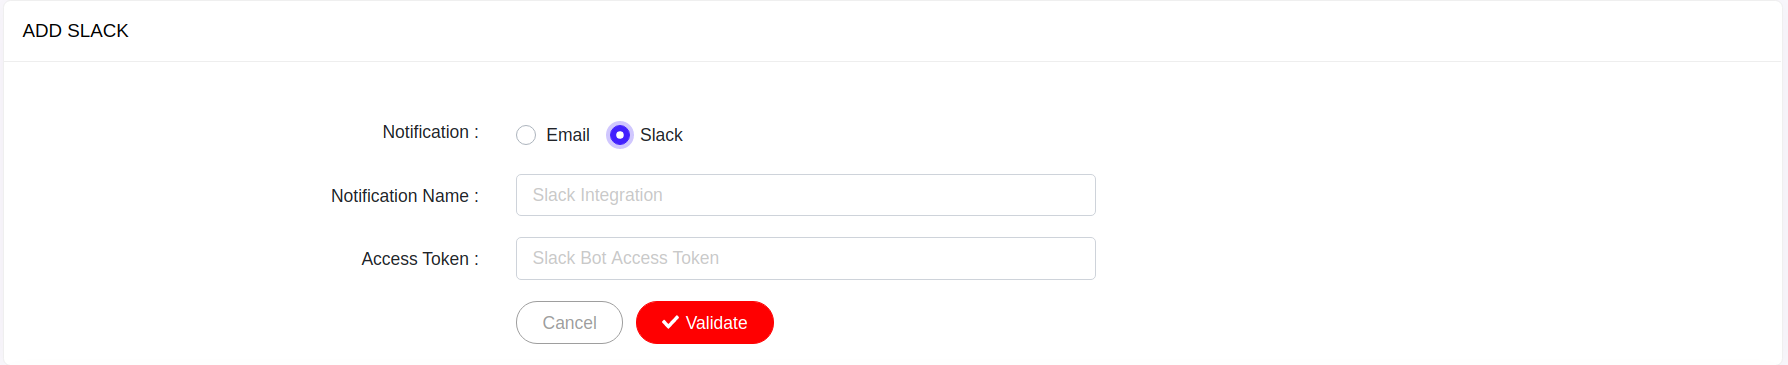
Notification Name - Slack notification name.
Access Token - Enter the Slack access token and validate by clicking Validate button.
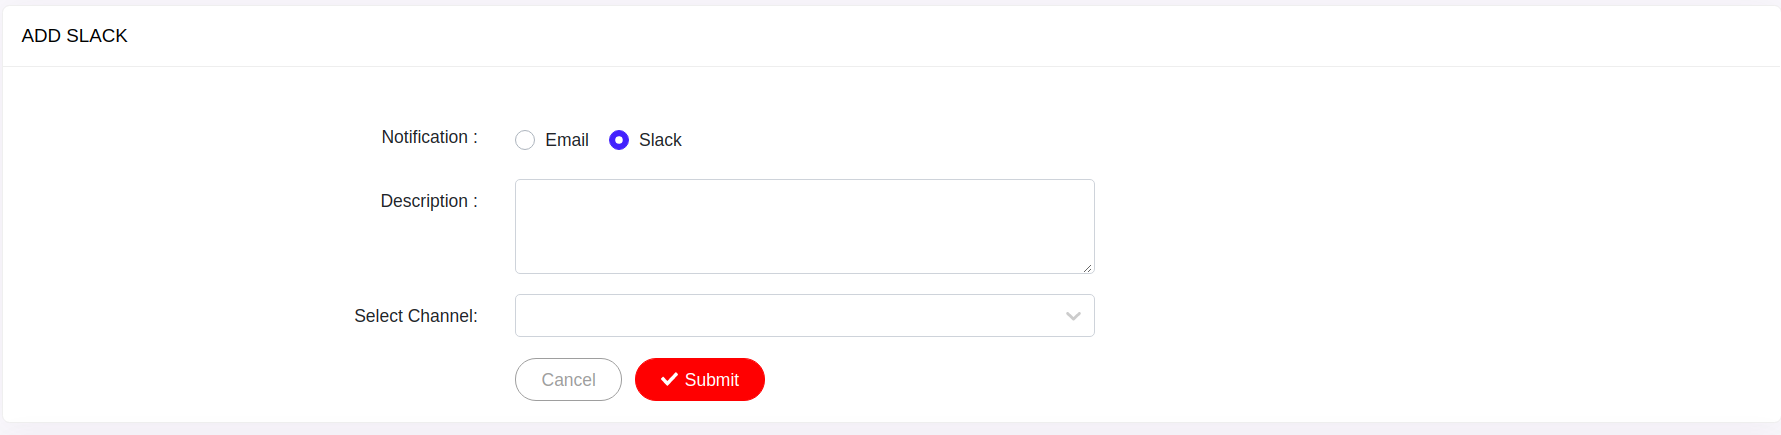
- Fill in the fields as follows:
Description - Description of the notification.
Select Channel - Select the Slack channel.
Click Submit to save the configuration.
Pagerduty
A Qualdo Notification Channel can integrate with Pagerduty service integration via the associated Pagerduty integration key. Refer to Pagerduty’s Event API v2 overview for guidance. Make sure the key is generated for the integration with which you are going to configure in Qualdo as a pagerduty notification channel. Once your Pagerduty service, integration and key are prepared, configure the Notification Channel as follows:
From the Alerts menu, click the Notification Channels tab
Select Pagerduty from the notifications list.
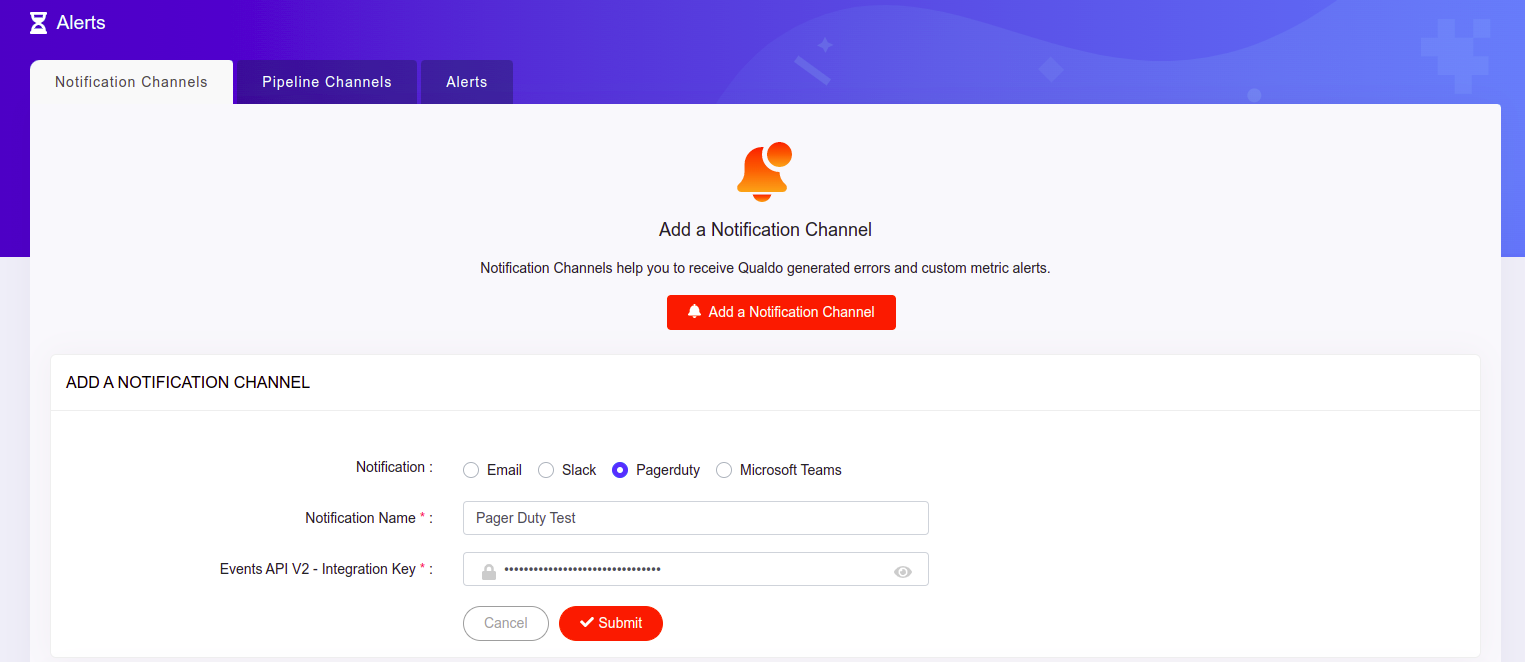
Notification Name - Pagerduty notification name.
Events API-V2 Integration Key - Enter the integration key for which alerts need to be sent.
Click Submit to save the configuration.
Microsoft Teams
A Qualdo Notification Channel can integrate with a Microsoft Teams channel app via webhook. Refer to MS Teams Webhook setup for channel for guidance. Make sure the webhook is integrated with the channel which you are going to configure in Qualdo as a MS Team’s notification channel. Once your MS Team webhook and channel are prepared, configure the Notification Channel as follows:
From the Alerts menu, click the Notification Channels tab
Select Microsoft Teams from the notifications list.
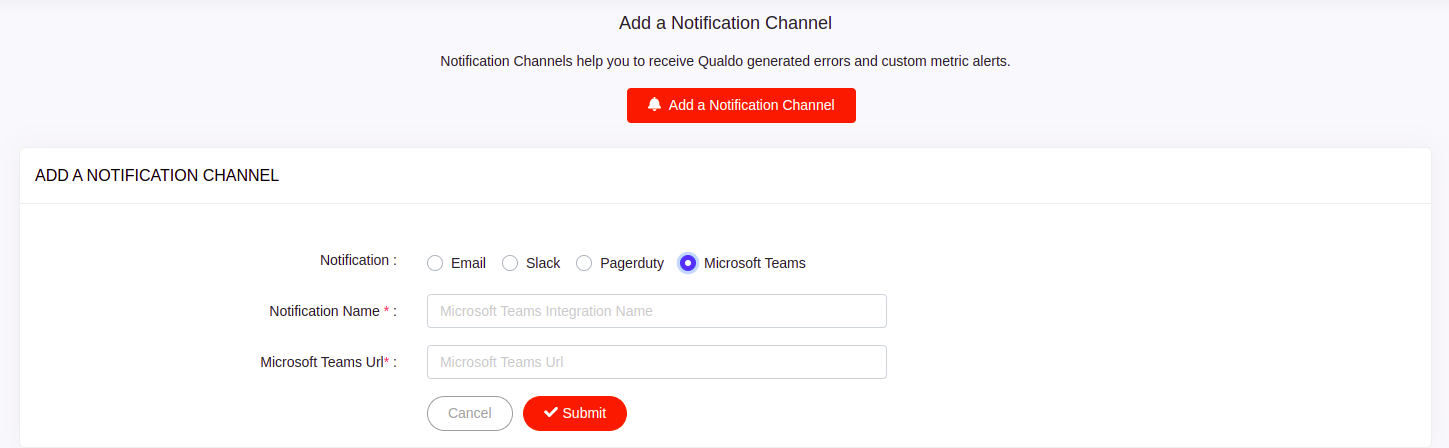
Notification Name - MS Teams notification name.
Microsoft Teams URL - Enter the Microsoft Teams webhook url.
Click Submit to save the configuration.
Pipeline Channels
Qualdo currently supports the following Pipeline Channels:
Webhook
The Webhook Pipeline Channel is a simple way to integrate with an HTTP endpoint.
From the Alerts menu, click the Pipeline Channels tab.
Select the Webhook Pipeline channels option.
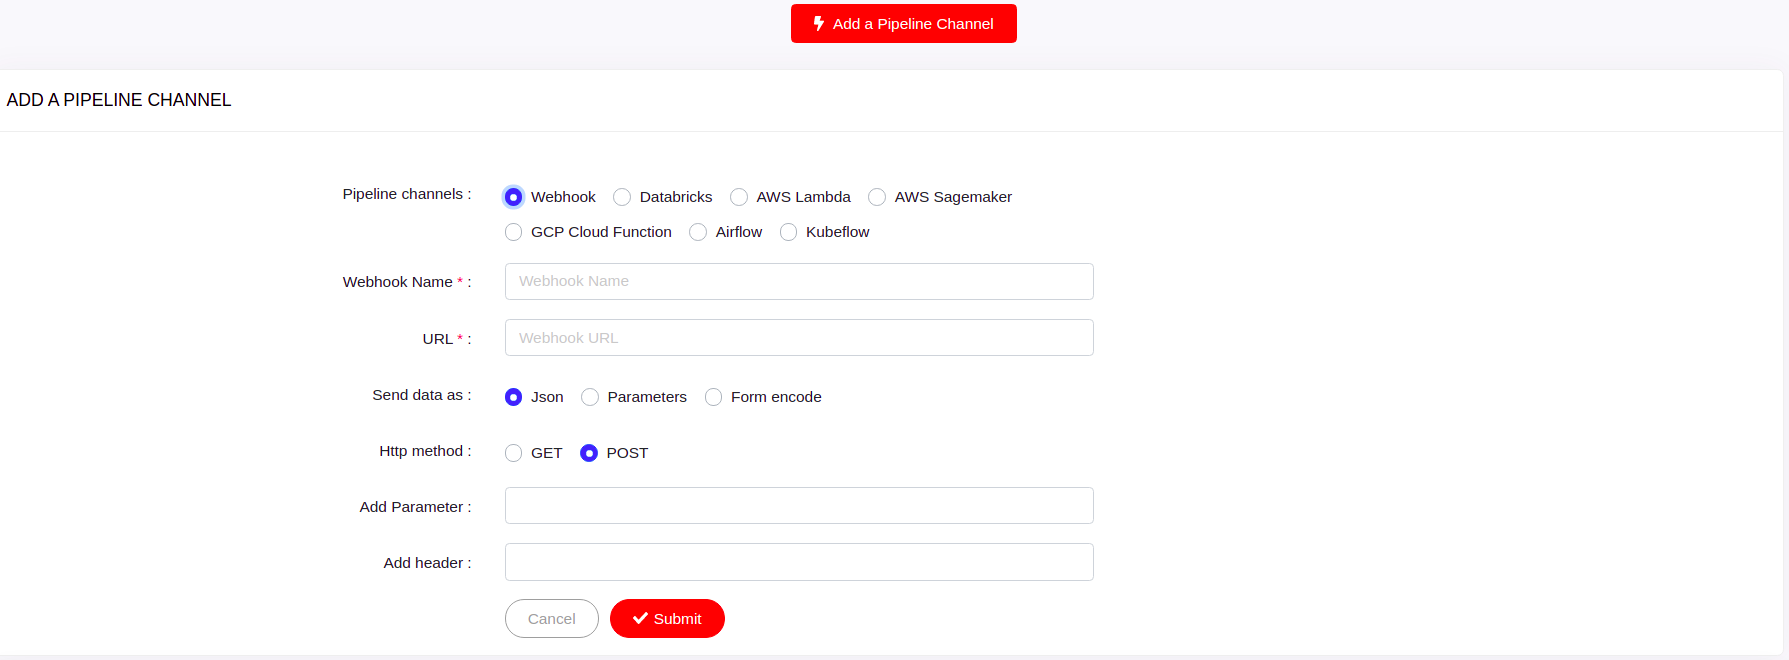
- Fill in the fields as follows:
Webhook Name - Webhook Pipeline Channel name.
URL - Webhook URL.
Send data as - Choose the type of the data to be sent.
Http method - Select the http method for the configured Webhook url.
Add Parameter - Optional. Enter the params in json format, if any parameter is expected.
Add header - Optional. Enter the header in json format, if any header is expected.
Click Submit to save the configuration.
Databricks
The Databricks Pipeline Channel is a simple way to invoke a Databricks job. A Databricks Pipeline Channel depends on a Databricks personal access token. Refer to Generate Databricks Token for guidance.
From the Alerts menu, click the Pipeline Channels tab.
Select the Databricks Pipeline channels option.
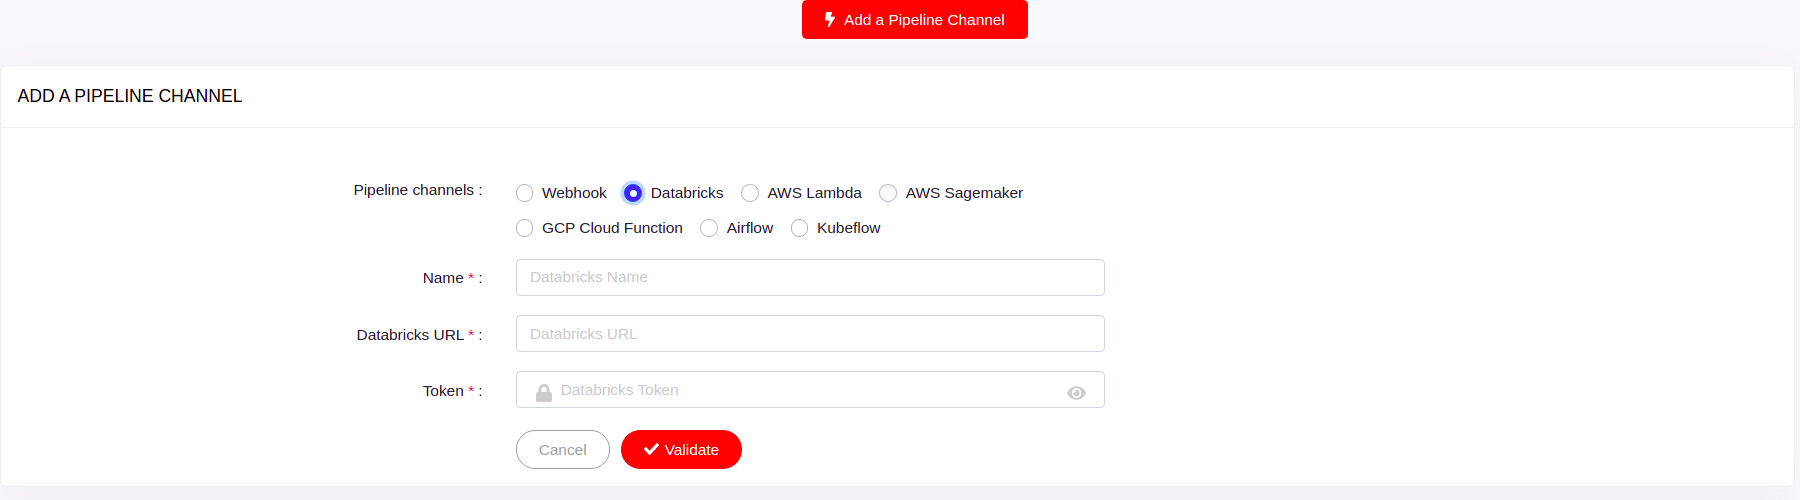
Name - Databricks Pipeline Channel name
Databricks URL - Enter the Databricks url.
Token - Enter the token for connecting with Databricks.
Click on Validate button to validate the credentials.
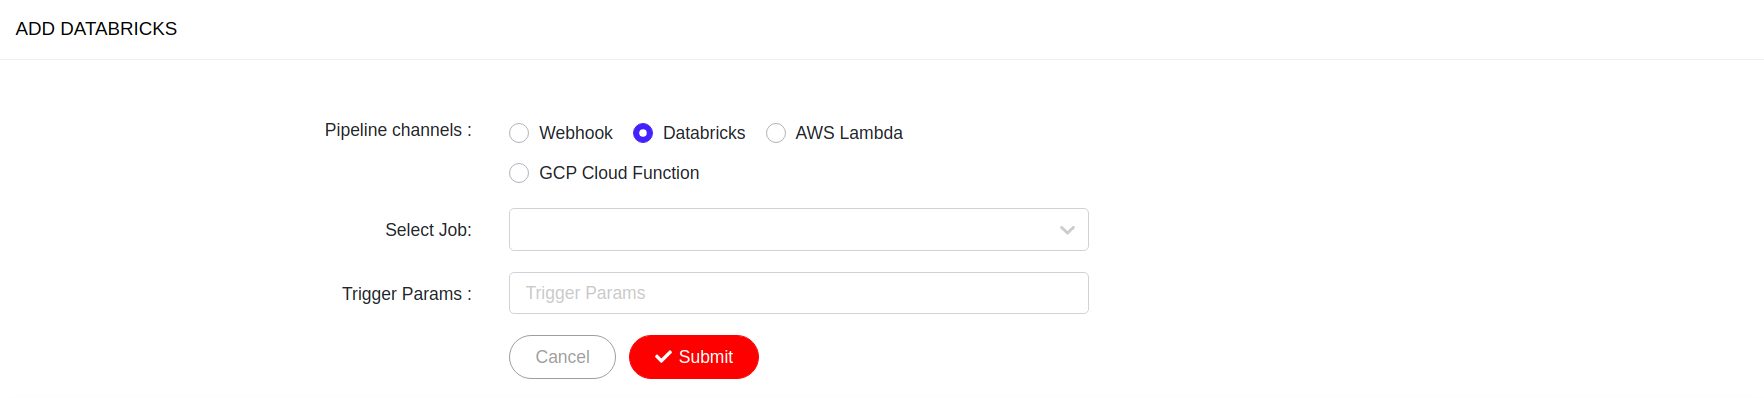
- Fill in the fields as follows:
Select Job - Select the Databricks job which needs to be invoked.
Databricks Trigger Params - Enter the Databricks Trigger Params as comma separated values(Example: 1, 2, 3) that need to be passed while invoking the Databricks job.
AWS Lambda
AWS Lambda Pipeline Channel is a simple way to invoke a lambda function. An AWS Lambda Pipeline Channel requires an Aws Access ID and AWS Secret Key. Refer to Create AWS Access Key for guidance.
From the Alerts menu, click the Pipeline Channels tab
Select the AWS Lambda Pipeline channels option.

- Fill in the fields as follows:
Name - Lambda Pipeline Channel name.
AWS Access Id - Enter the AWS Access Id.
AWS Secret Key Access - Enter the AWS Secret Key.
AWS Region - Enter the region where the bucket is created.
Click Validate to validate and save the configuration.
Google Cloud Function
Google Cloud Function Pipeline Channel is a simple way to invoke a Google Cloud Function.
From the Alerts menu, click the Pipeline Channels tab
Select the Google Cloud Function Pipeline channels option.
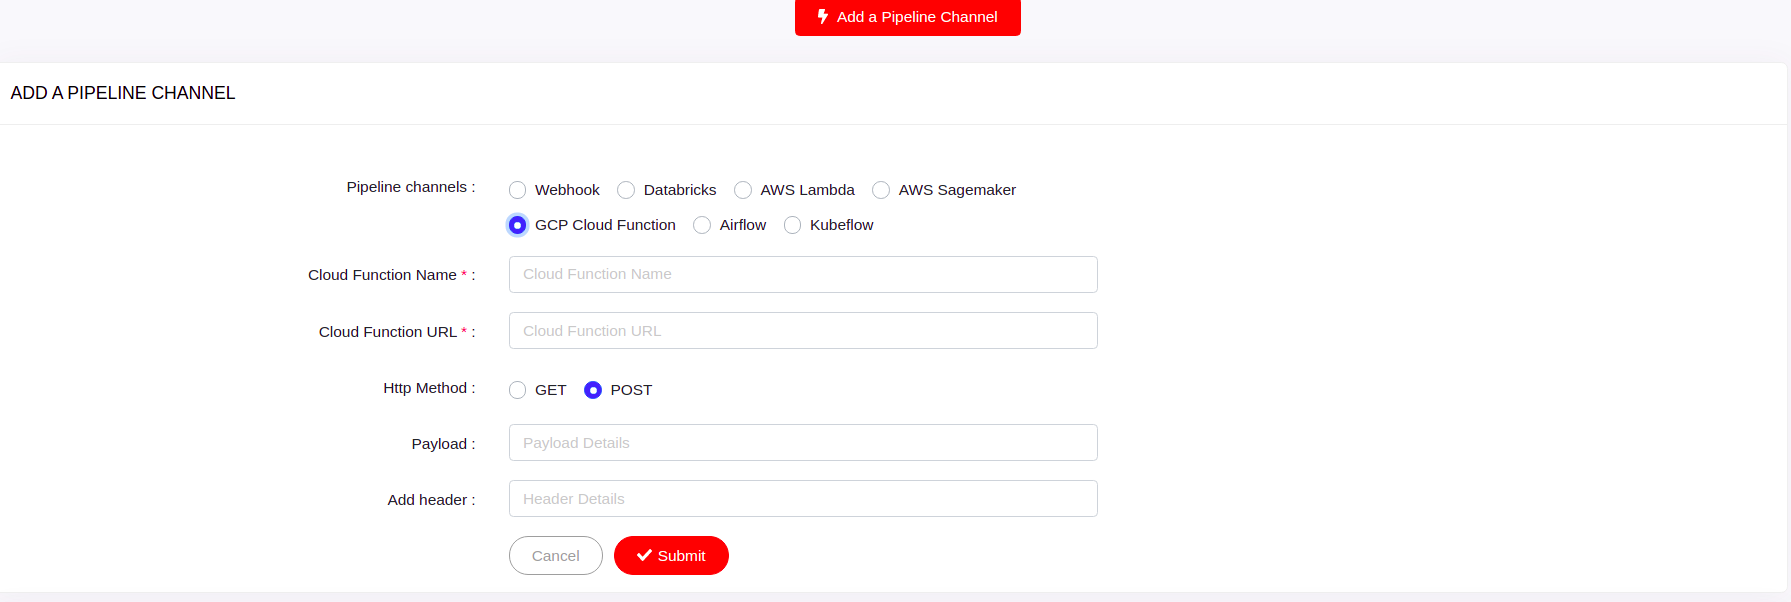
- Fill in the fields as follows:
Cloud Function Name - Google Cloud Function Pipeline Channel name.
Cloud Function URL - Google Cloud Function URL.
Http Method - Select the http method.
Payload - Optional. Enter the payload details in json format, if expected any format.
Add header - Optional. Enter the header in json format, if any header is expected.
Click Submit to save the configuration.
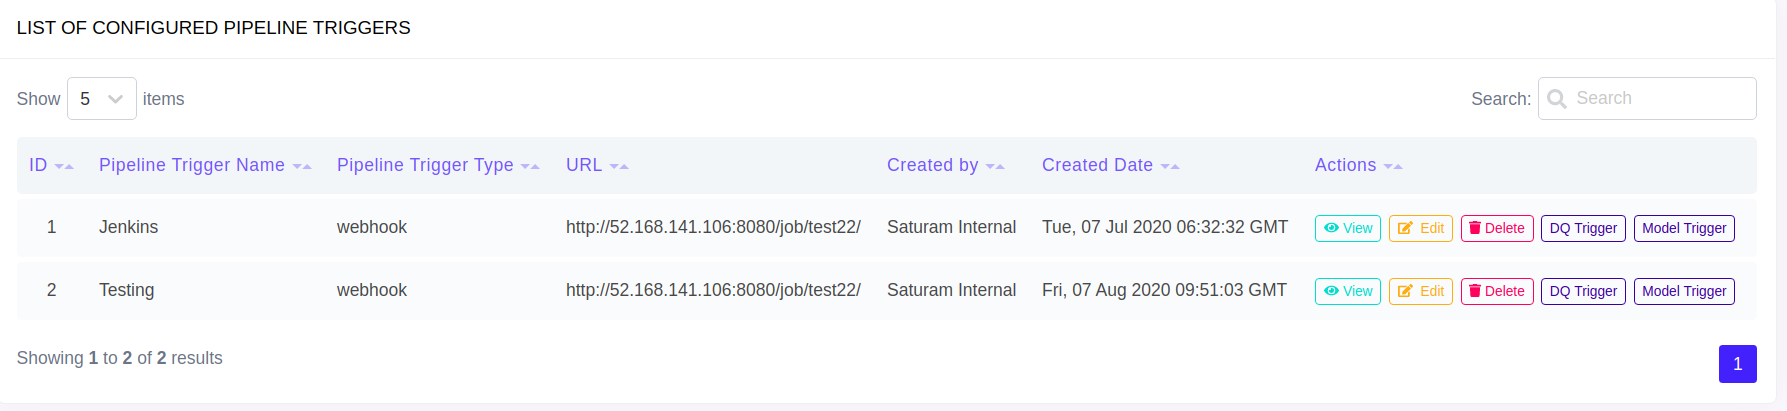
- After configuring Pipeline Channel(s), the configured channel will be available in the grid which is present at the bottom of the page.
AWS Sagemaker
AWS Sagemaker Pipeline Channel is a simple way to invoke a sagemaker endpoint(job). An AWS Sagemaker Pipeline Channel requires an Aws Access ID and AWS Secret Key. Refer to Create AWS Access Key for guidance.
From the Alerts menu, click the Pipeline Channels tab
Select the AWS Sagemaker Pipeline channels option.
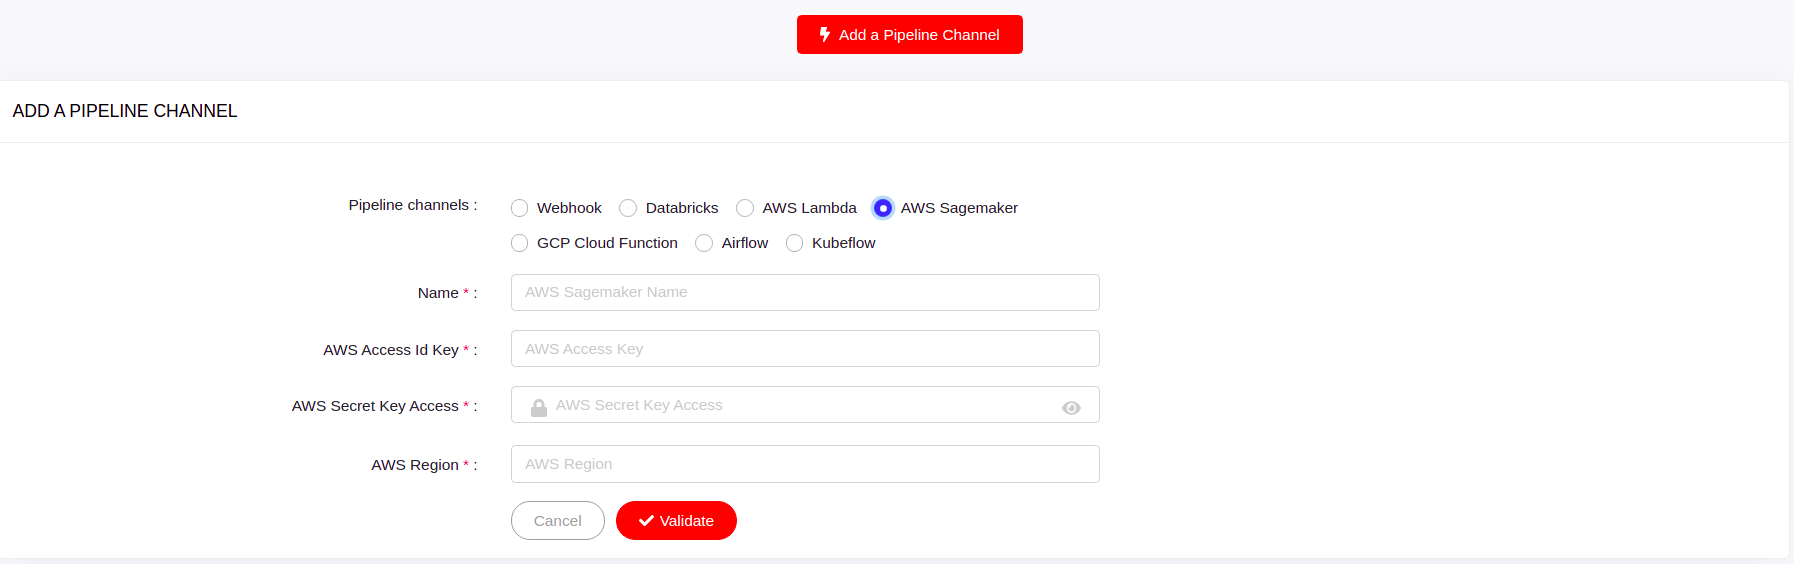
- Fill in the fields as follows:
Name - Sagemaker Pipeline Channel name.
AWS Access Id Key - Enter the AWS Access Id.
AWS Secret Key Access - Enter the AWS Secret Key.
AWS Region - Enter the region where the bucket is created.
Click Validate to validate and save the configuration.

- Fill in the fields as follows:
Select Endpoint - Select the Sagemaker endpoint which needs to be invoked.
Payload - Enter the params as comma separated values(Example: 1, 2, 3) that need to be passed while invoking the Sagemaker endpoint.
Airflow
Airflow Pipeline Channel is a simple way to invoke a airflow dag.
From the Alerts menu, click the Pipeline Channels tab
Select the Airflow Pipeline channels option.
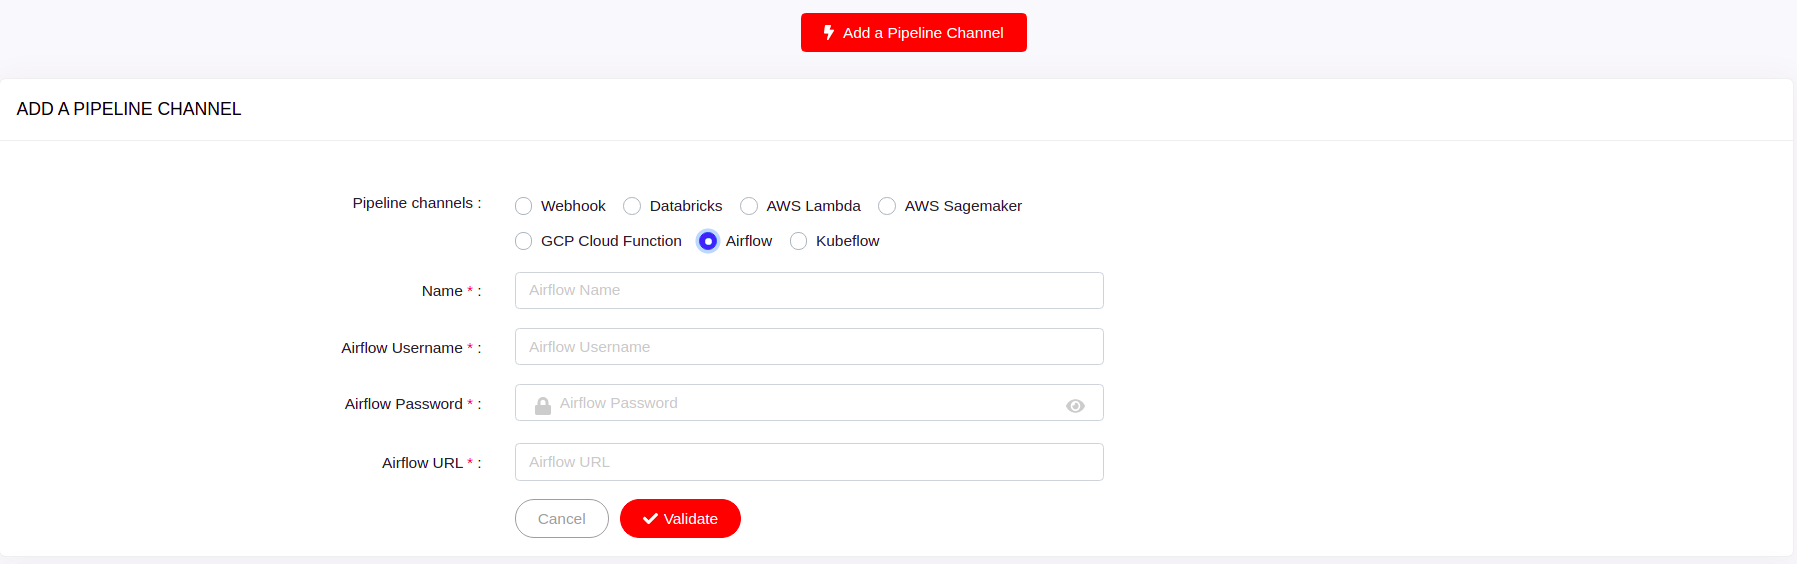
- Fill in the fields as follows:
Name - Airflow Pipeline Channel name.
Airflow Username - Enter the username for airflow.
Airflow Password - Enter the password for airflow user.
Airflow URL - Enter the url of airflow.
Click Validate to validate and save the configuration.

- Fill in the fields as follows:
Select Dag - Select the Airflow dag which needs to be invoked.
Payload - Optional. Enter the params that need to be passed while invoking the dag.
Kubeflow
Kubeflow Pipeline Channel is a simple way to invoke a kubeflow pipeline.
From the Alerts menu, click the Pipeline Channels tab
Select the Kubeflow Pipeline channels option.
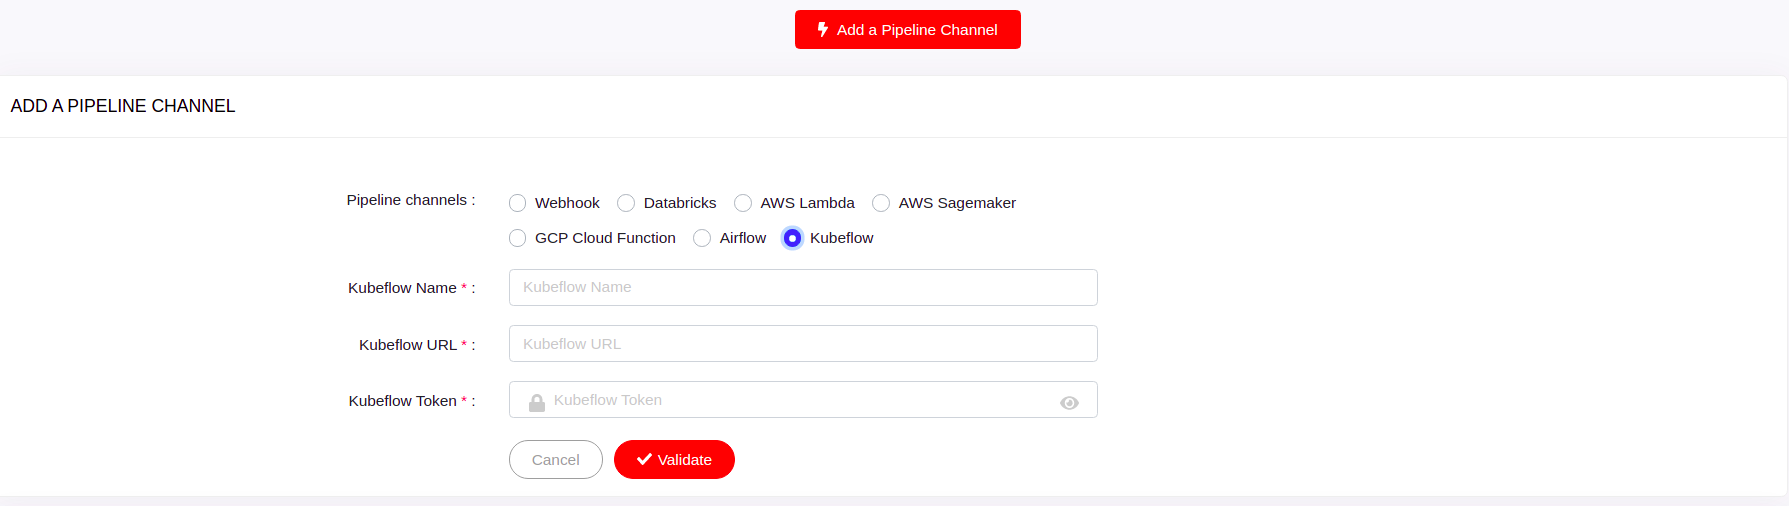
- Fill in the fields as follows:
Kubeflow Name - Kubeflow Pipeline Channel name.
Kubeflow URL - Enter the url of kubeflow.
Kubeflow Token - Enter the token for the kubeflow.
Click Validate to validate and save the configuration.

- Fill in the fields as follows:
Select Pipeline - Select the Kubeflow pipeline which needs to be invoked.
Trigger Payload - Enter the payload in json format which contains the experiment id to which the selected pipeline belongs to.
In the grid at the end of each configured channel you will see a button DQ Alert. Click on the buttons to configure the Alert. Clicking on the button will take you to the Add Alert Form.
Configuring an Alert
- Qualdo currently supports the following Custom Alert types:
Data Quality Alerts
Model Alerts
- Following are the list of instructions to add an alert:
From the Alerts menu, click the Data Quality Alerts from Alerts tab.
You’ll be taken to the Alert page where you can add an Alert.
Click Add Data Quality Alert button and you will come to the configuration page of your new Alert.
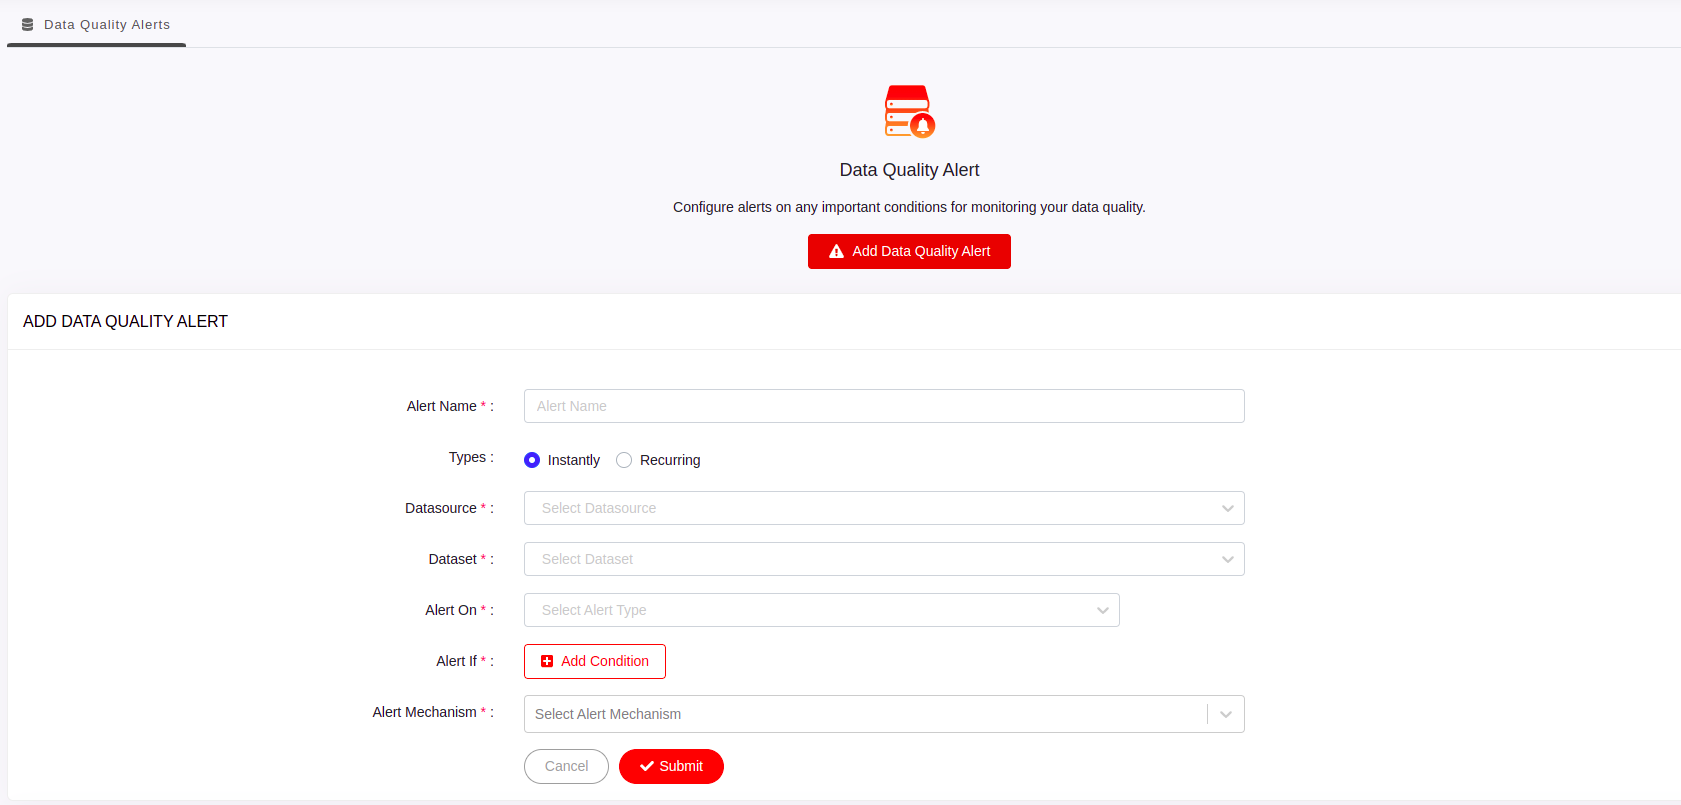
- Fill in the alert details:
Alert Name - Enter a name for the Alert.
Type - Instantly/Recurring - Choose whether Alert actions are instant or according to a schedule.
Alert Period - Select the action interval if Recurring is selected in the Type.
Datasource - Select the Datasource to enable alert on the dataset present in it.
Dataset - Select the Dataset for which the alert is enabled.
Alert On - Choose the type of the alert that has be to enabled.
Attribute - Select the attribute if one of the Attribute Level options is chosen from the Alert On dropdown.
Alert If - Define your Alert condition. If the metric results meet the condition, action will be invoked.
Alert Mechanism - Select the Notification Channel(s)/Pipeline Channel(s) that should be invoked.
Click Submit to save your Alert.
Note
You can see the configured Notifications, Pipelines and Alerts at the end of the respective pages.