How To Deploy
Qualdo - DRX Installation Steps:
Step 1 - Login to Azure:
Please login to your Azure account.
Step 2 - Locate Qualdo-DRX in Azure Marketplace:
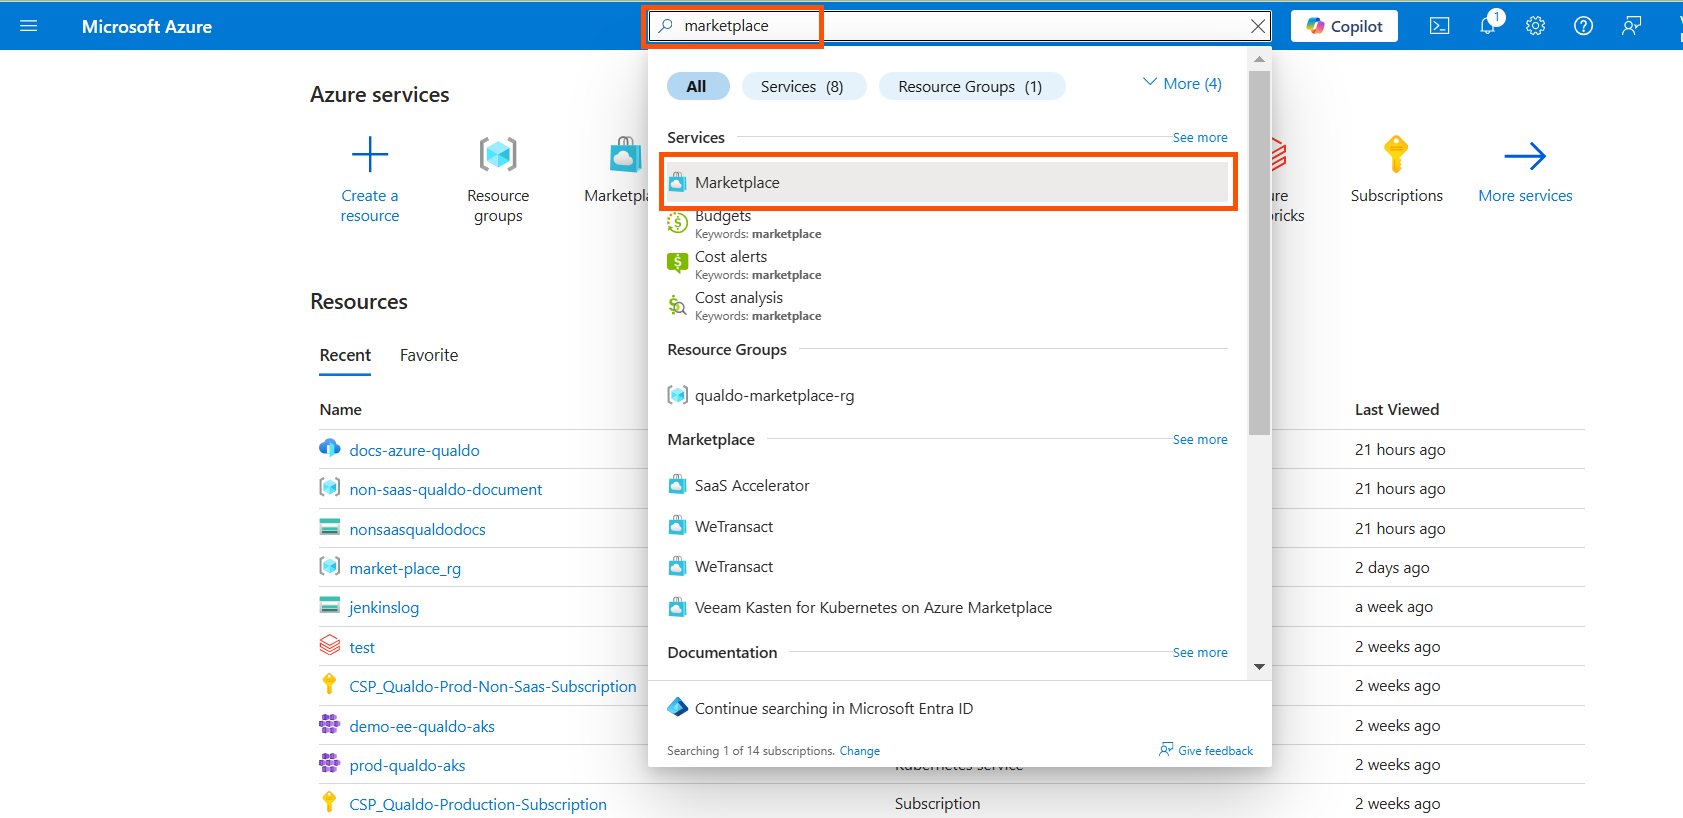
After login, type “Marketplace” in the Search Bar. Click on ‘Marketplace’ that is listed in the ‘Services’ section as shown below.
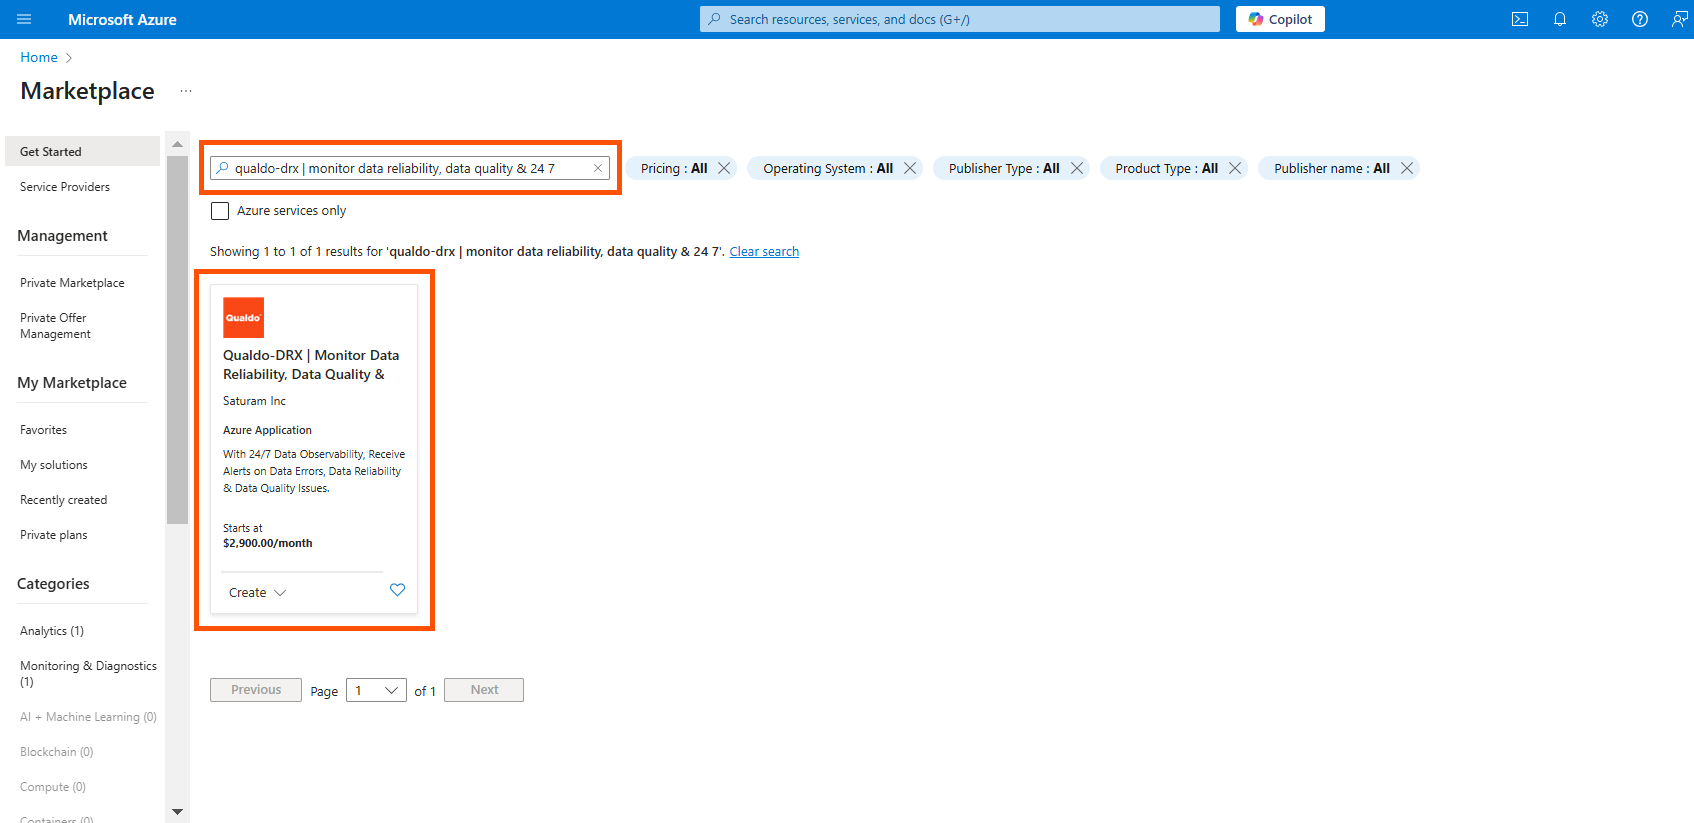
In the Marketplace’s Search bar, type “Qualdo-DRX” and press enter. Click on Qualdo-DRX that is listed as shown below.
Step 3 - Product Overview And Create:
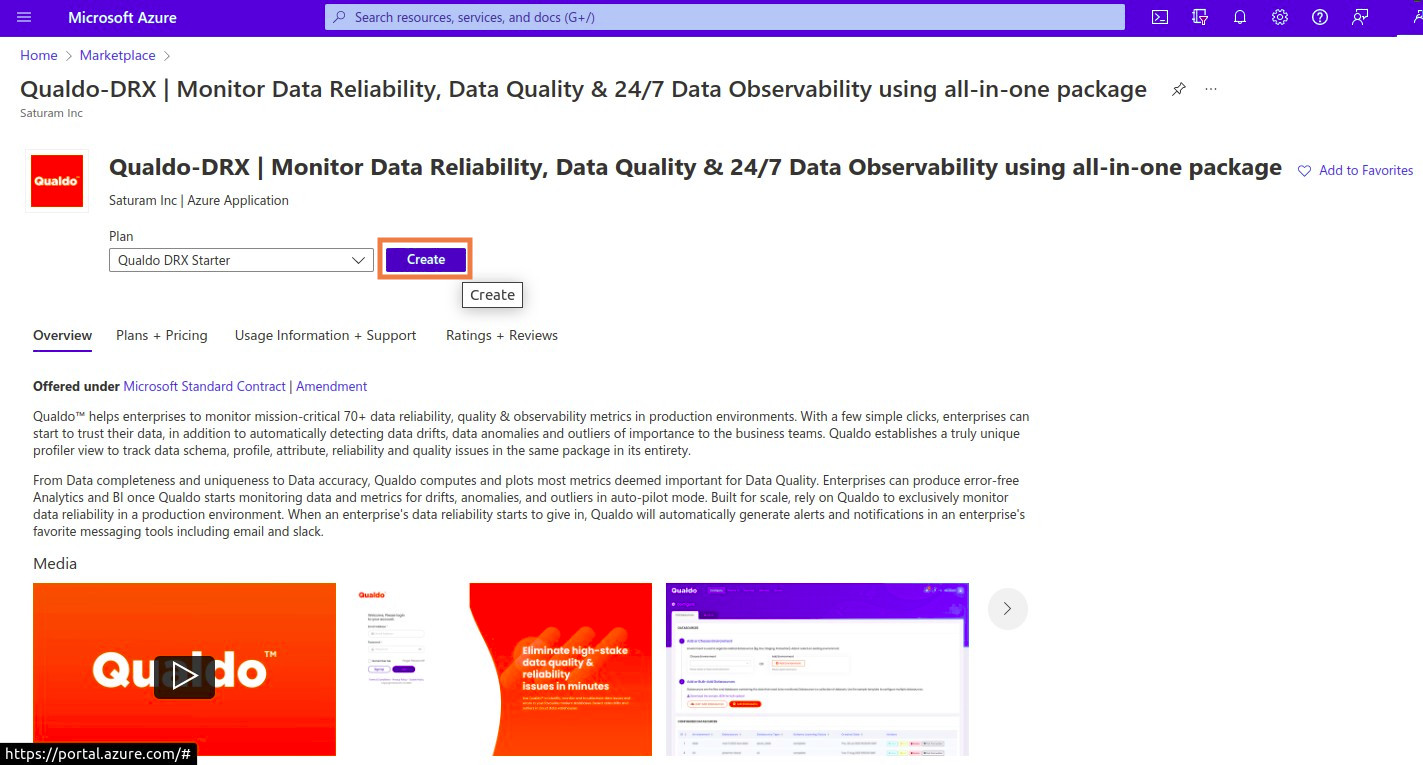
The details of the Qualdo-DRX managed application can be found in this page. Click on the Create button.
Step 4 - Fill the Necessary Information:
This section will help you fill out all the details necessary for deploying Qualdo-DRX.
Basics
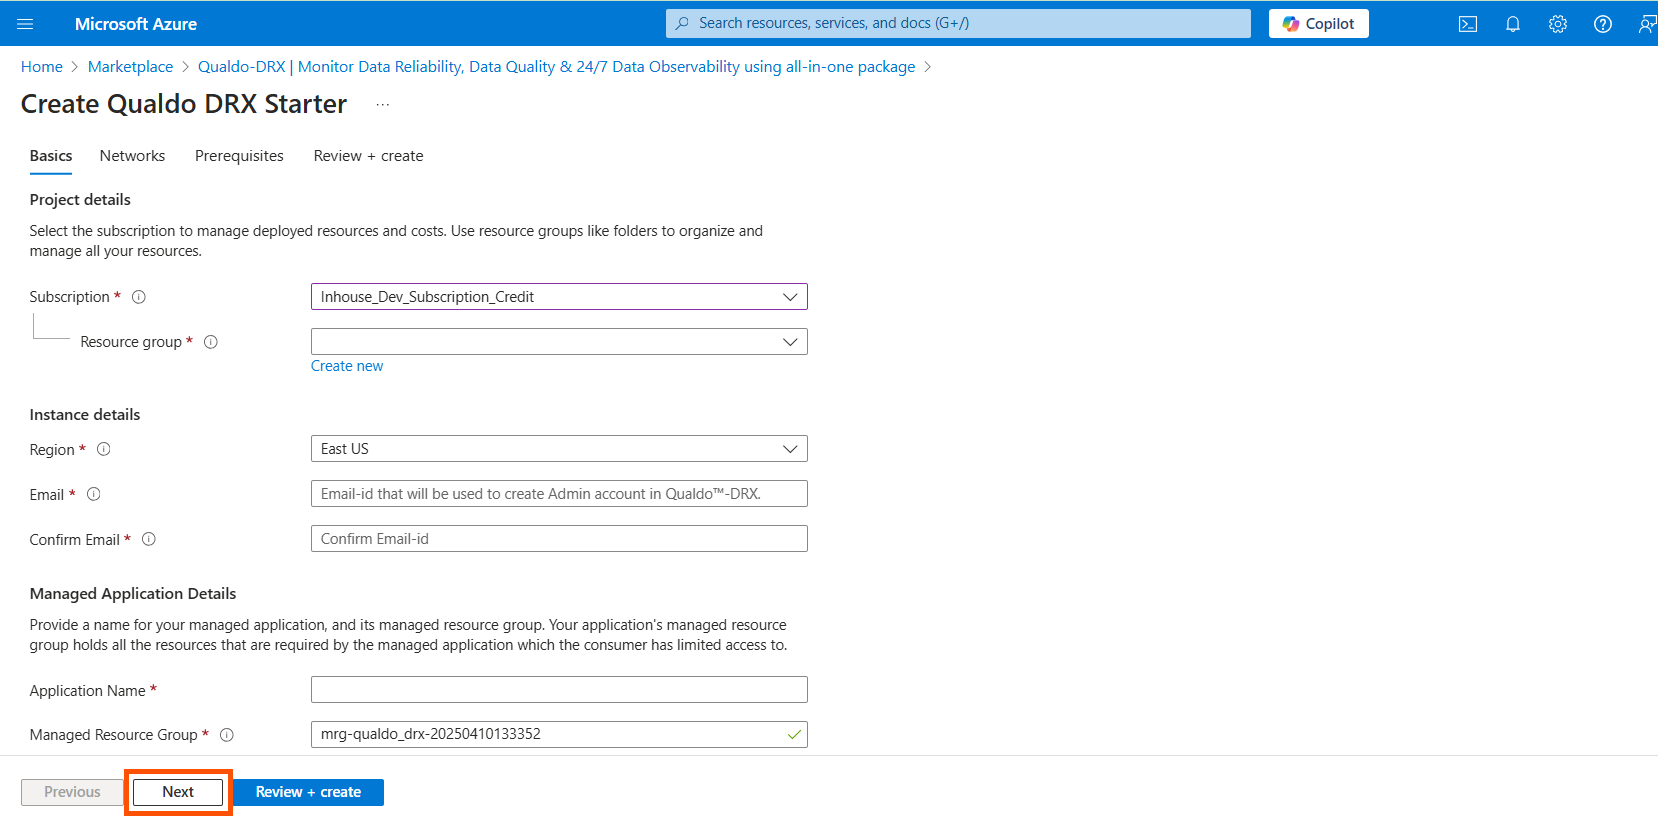
Project Details
- Subscription*
Select the subscription in which you want to deploy Qualdo-DRX.
- Resource group*
A resource group is a collection of resources that share the same lifecycle, permissions, and policies. You can use resource groups like folders to organize and manage all your resources. Select a pre-existing resource group or create a new resource group.
Instance details
- Region*
The region in which you want Qualdo-DRX to be deployed.
- Email*
This email id must have azure account. This email-id will be used to create the ADMIN for the Qualdo-DRX. Upon the successful deployment of Qualdo-DRX, an email will be sent to the Admin. The Admin will have administrative control over Qualdo-DRX and will be able to add and remove users in Qualdo-DRX. It is recommended that the email-id of the user making the deployment be given here.
- Confirm Email*
This Email ID will be used to create the ADMIN in Qualdo-DRX. This email-id should be the same as the email-id given above in the “Email” section.
Managed Application Details
Provide a name for your managed application, and its managed resource group. Your application's managed resource group holds all the resources that are required by the managed application which the consumer has limited access to.
- Application Name*
Please provide a name for the Qualdo-DRX.
- Managed Resource Group*
This is an optional field. This resource group holds all the resources that are required by Qualdo-DRX. For example, this resource group contains the virtual machines, storage accounts, virtual network etc., required for the solution. After filling the required information, click on “Next>” button.
Networks
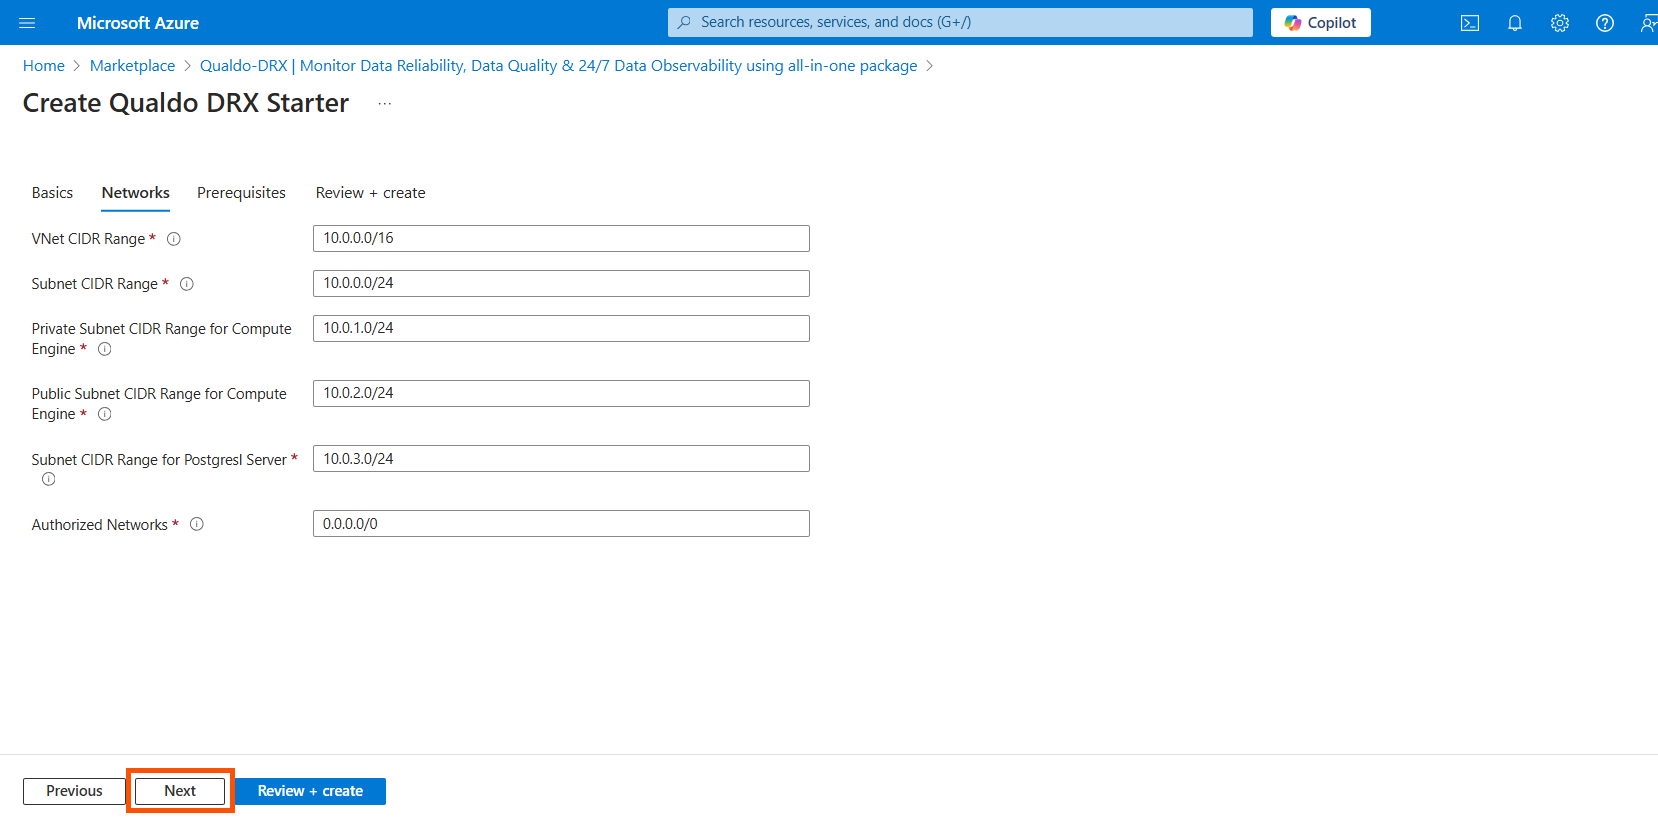
- Vnet CIDR Range*
This is an optional field. The default value is 10.0.0.0/16. You can choose to specify the Vnet CIDR Range for Qualdo-DRX. Please enter the IP range (CIDR notation) for the Vnet and ensure it has a minimum of 1,024 addresses i,e, a CIDR notation of /22 at least. For more information please refer to the “Related Resources” section.
- Subnet CIDR Range*
This is an optional field. The default value is 10.0.0.0/24. You can choose to specify the Subnet CIDR Range for Qualdo-DRX. Please enter the IP range (CIDR notation) for the Subnet and ensure it has a minimum of 256 addresses i.e., a CIDR notation of /24 at least. This subnet CIDR range is reserved for all resources other than the compute engine of Qualdo-DRX. It must be contained by the address space of the VNet.
- Private Subnet CIDR Range for Compute Engine*
This is an optional field. The default value is 10.0.1.0/24. You can choose to specify the Private Subnet range in CIDR notation and ensure that it has a minimum of 256 addresses, i.e., a CIDR notation of /24 at least. This private subnet CIDR range is reserved for the compute engine of Qualdo-DRX. It must be contained by the address space of the VNet.
- Public Subnet CIDR Range for Compute Engine*
This is an optional field. The default value is 10.0.2.0/24. You can choose to specify the Public Subnet in CIDR notation and ensure that it has a minimum of 256 addresses, i.e., a CIDR notation of /24 at least. This public subnet CIDR range is reserved for the compute engine of Qualdo-DRX. It must be contained by the address space of the VNet.
- Subnet CIDR Range for Postgresql Server*
This is an optional field. The default value is 10.0.3.0/24. You can choose to specify the Subnet in CIDR notation and ensure that it has a minimum of 256 addresses, i.e., a CIDR notation of /24 at least. This public subnet CIDR range is reserved for the Postgresql Server of Qualdo-DRX. It must be contained by the address space of the VNet.
- Firewall Public IP*
Provide the Public IP of the firewall.
- Firewall Private IP *
Provide the Private IP of the firewall.
- Firewall Public DNS Name *
Provide the DNS name associated with the public IP of the firewall.
- Inbound TLS endpoint's Public DNS Name *
This field is optional if your firewall natively supports inbound TLS. If it does not, provide the Public DNS name of the service provisioned in front of the firewall to handle inbound TLS.
PrerequisitesPlease click on Resource requirements of Qualdo™-DRX to understand the resources required for a successful deployment and seamless functioning of Qualdo-DRX. Check I have read & understood the resource requirements for Qualdo™-DRX and I confirm the availability of the required resources exclusively for Qualdo™-DRX.
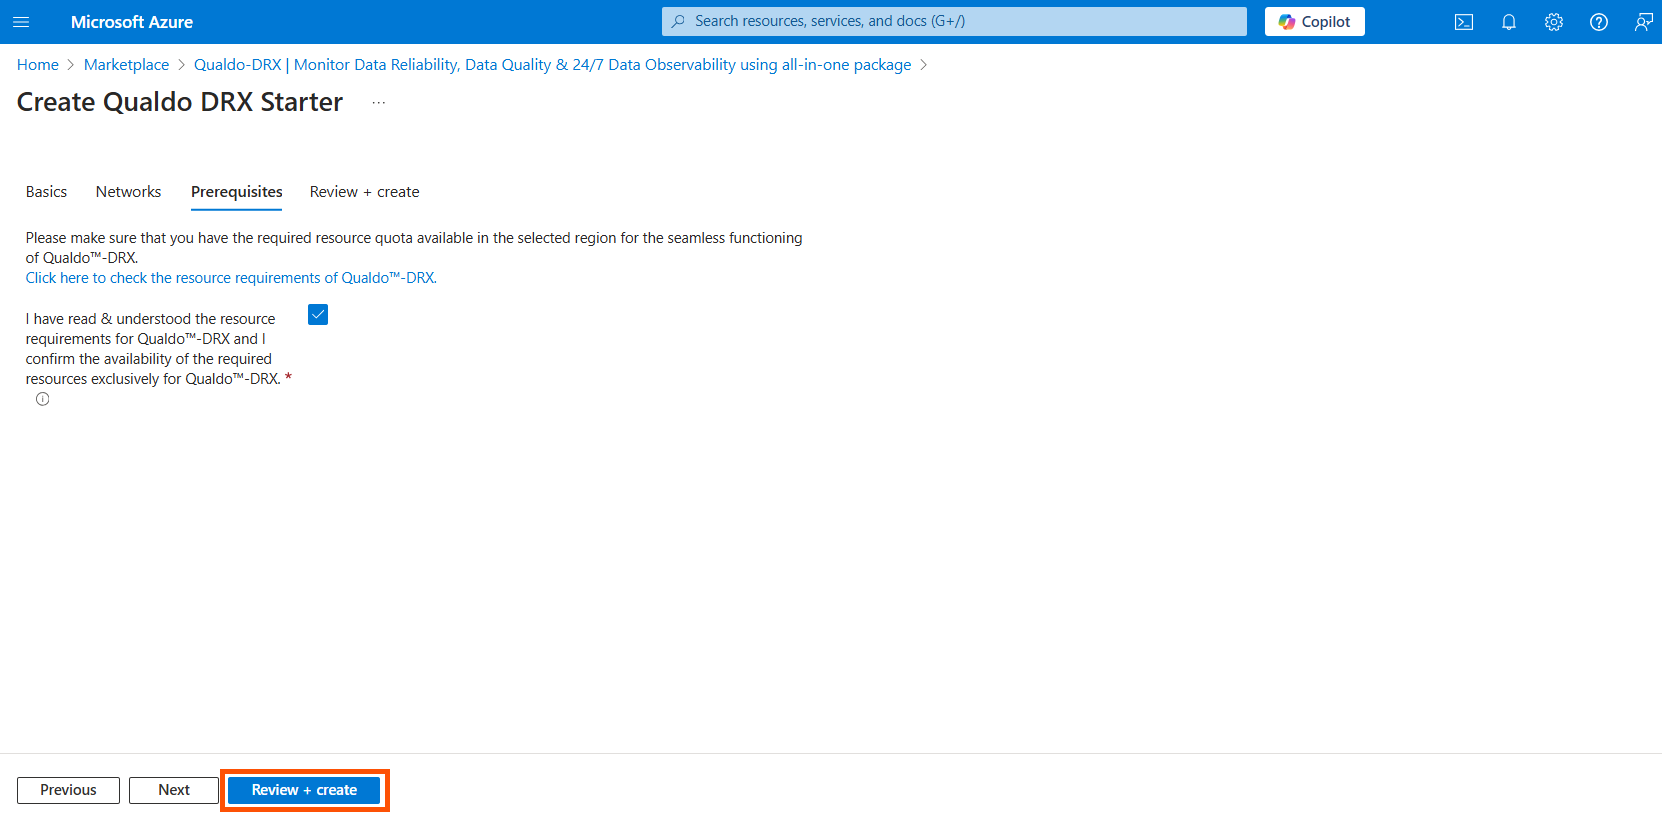
Click on the “Next : Review + create>” button.
Review + Create
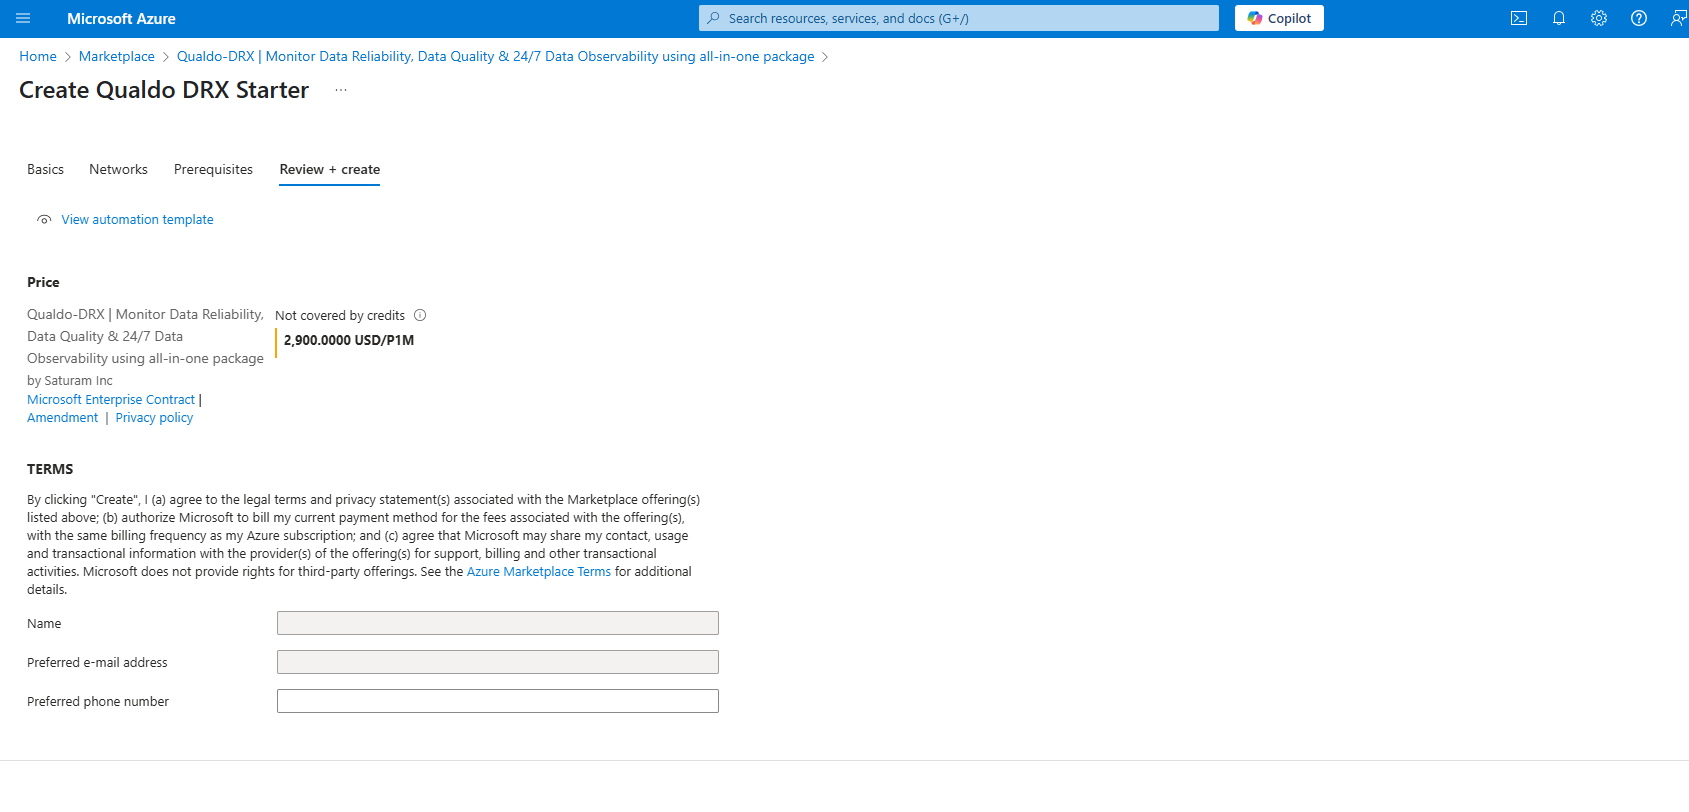
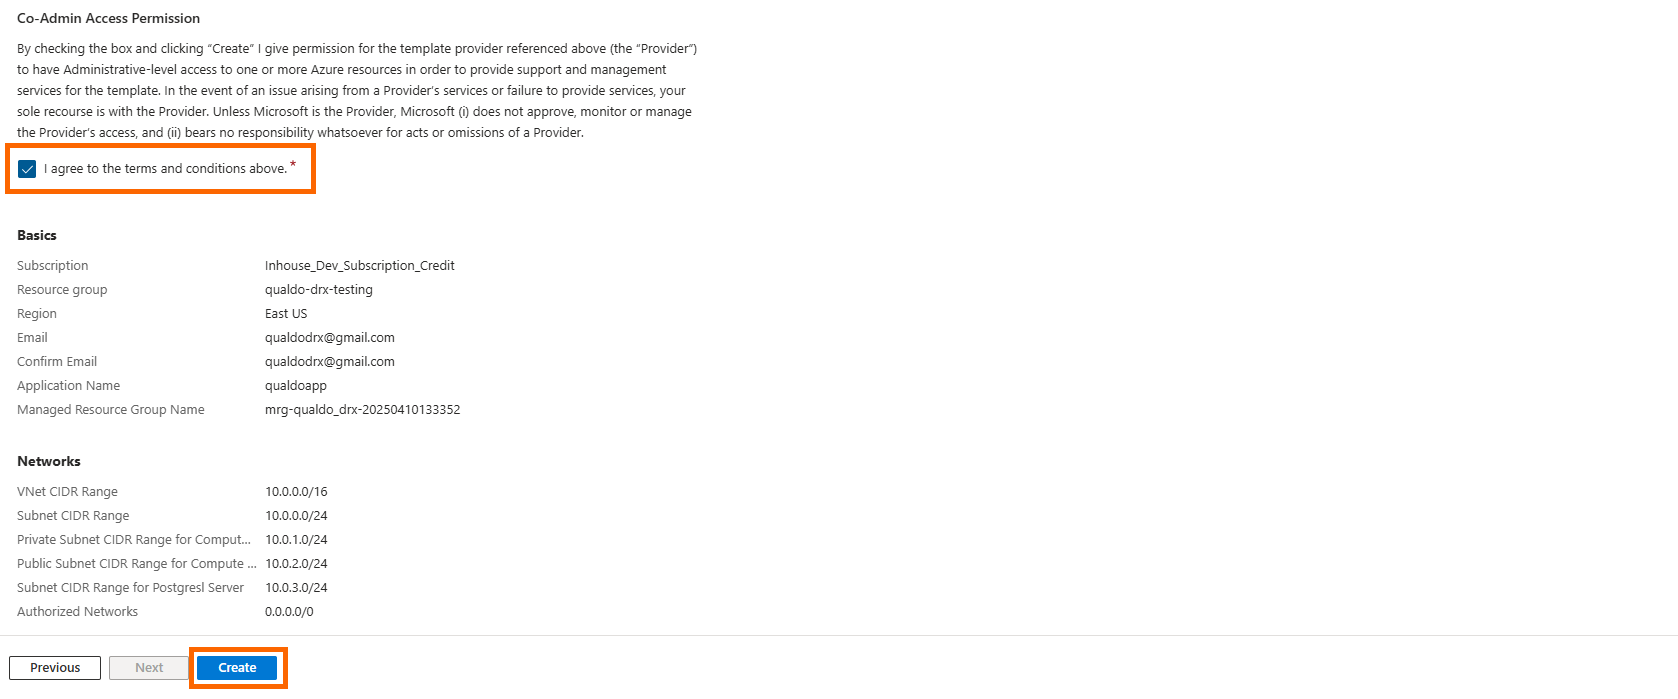
Once you've checked out the 'Terms and Conditions', click the "Create" button to deploy Qualdo-DRX.
Product Details
- Validation Status
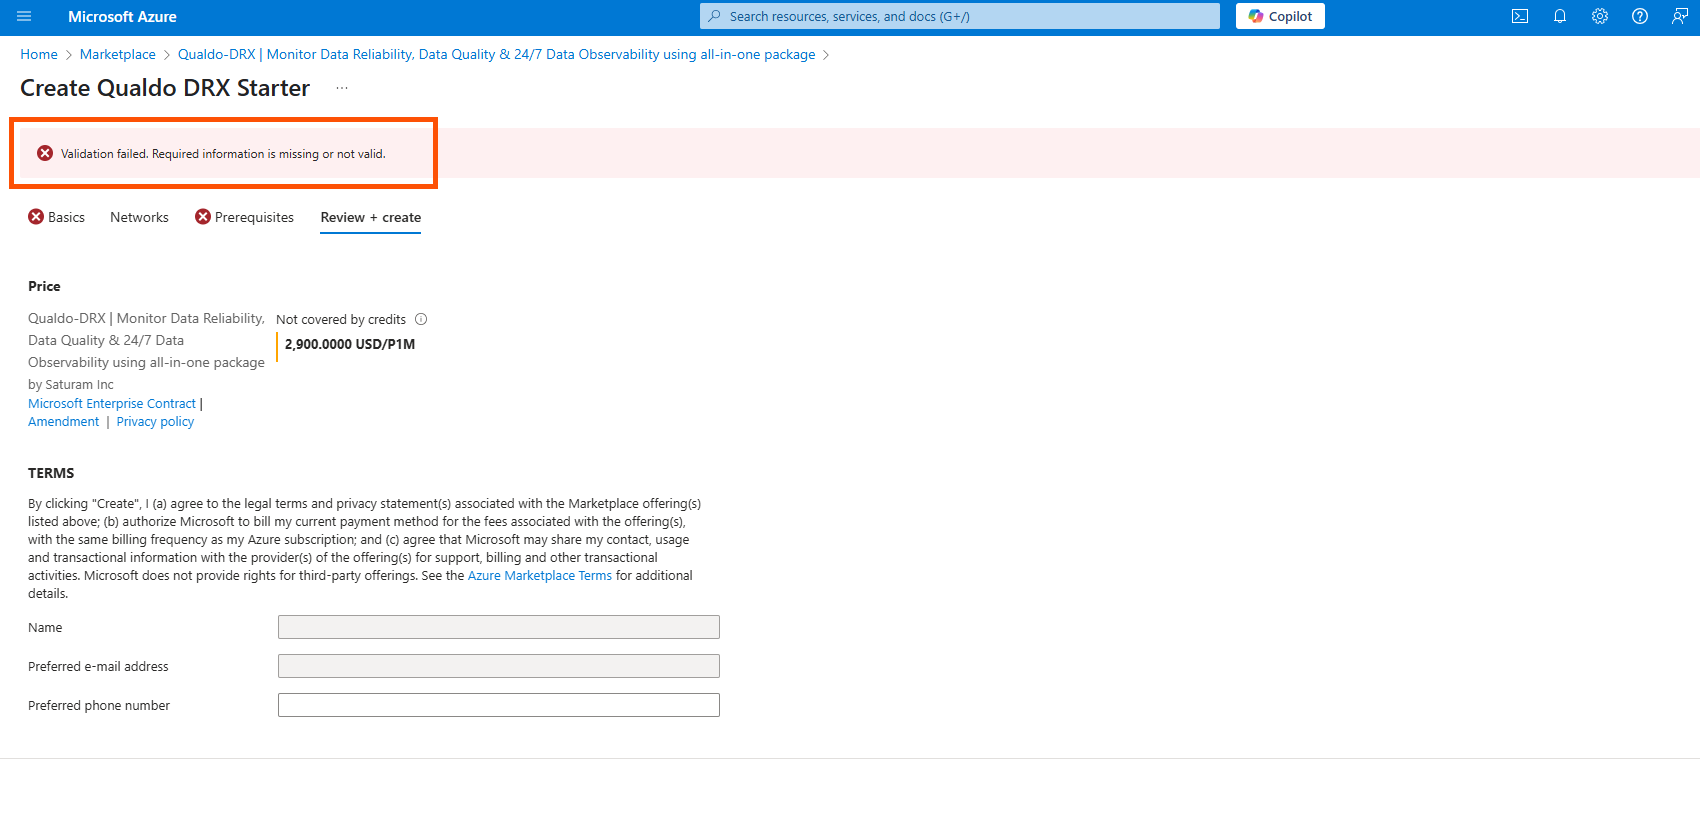
The Mandatory field and input parameter of all the previous pages will be validated. If it fails, then the validation status will be displayed. Please check the previous pages for any missing fields or invalid inputs and correct them
- Preferred phone number
This is an optional field. Here you can give your mobile number in preferred phone number input box.
- Co-Admin Access Permission
You will need to give us the permission to have Administrative-level access to one or more Azure resources in order to provide support and management services. Check I agree to the terms and conditions above.
Once you've checked out the 'Terms and Conditions', click the "Create" button to deploy Qualdo-DRX.
Step 5 - Deployment:
After clicking Create, monitor the deployment progress via the dashboard. While the Qualdo VNET creation typically concludes within a few minutes, there is a critical 10-minute window for the VNET peering process.
You must initiate and complete the VNET peering steps (detailed below) within this 10-minute interval. Failure to perform these configurations may result in a deployment failure.
When Qualdo-DRX is being deployed you can see that the status will be “Deployment is in progress” as shown below.
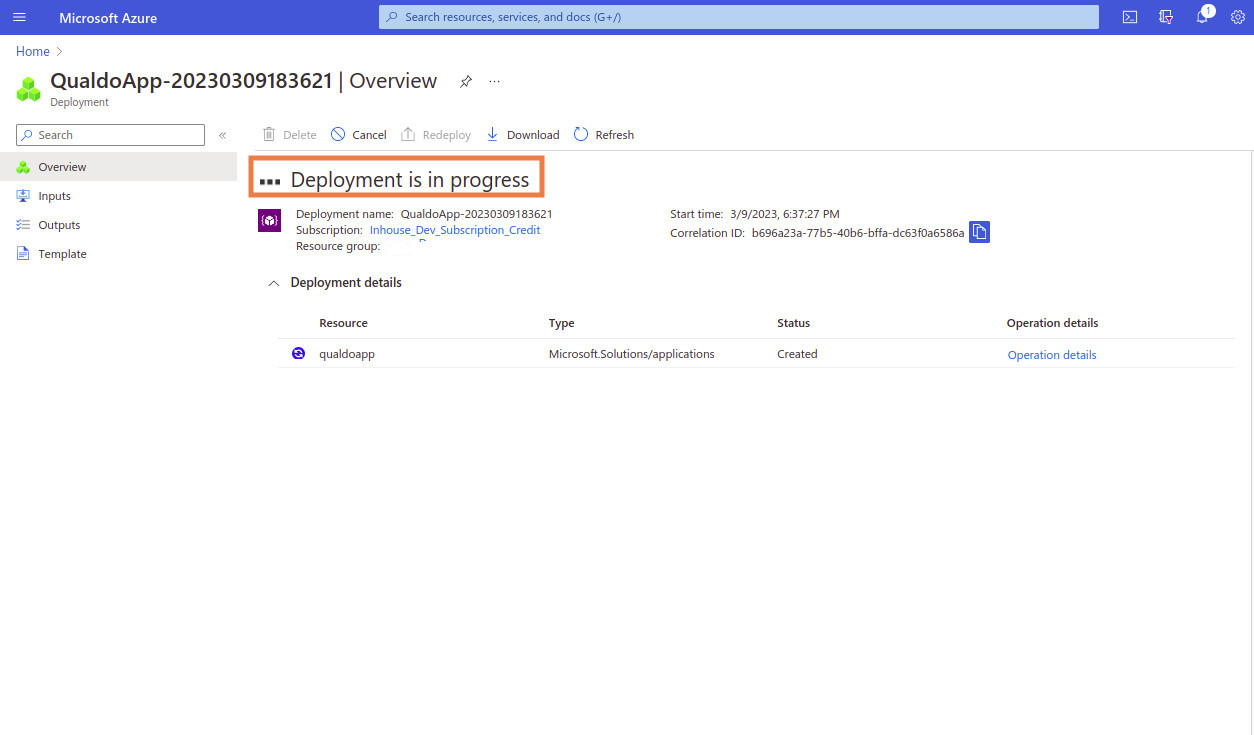
Then, click on the Resource group.
Select the Managed Application as shown below.
Then, click on the Managed resource group. Wait for the Vnet creation.
Once VNet creation is completed, follow the steps below to establish VNET peering.
- select the Qualdo VNet.
- From the left-hand menu, under the Settings section, select Peerings.
- Select + Add.
- Under Remote virtual network summary:
- Set Peering type to Virtual Network.
- Select the Subscription and VNet of the firewall.
- Under Remote virtual network peering settings, check the following:
- Allow the peered virtual network to access Qualdo Vnet.
- Allow the peered virtual network to receive forwarded traffic from Qualdo Vnet.
- Under Local virtual network peering settings, check the following:
- Allow Qualdo Vnet to access the peered virtual network.
- Allow Qualdo Vnet to receive forwarded traffic from the peered virtual network.
- Select Add to finalize the connection.
Once the deployment is finished, a DNAT Rule must be configured in the Firewall.
The DNAT rule configuration requires the Load Balancer IP, which can be retrieved by following these steps:
- In the Qualdo Managed resource group, select the Kubernetes service (AKS).
- Open the JSON View of the selected resource and locate the nodeResourceGroup name.
- Navigate to that node resource group and select the Load Balancer resource.
- From the Load Balancer Overview page, copy the Private IP address.
- Use this Private IP as the Translated Address during your DNAT configuration.
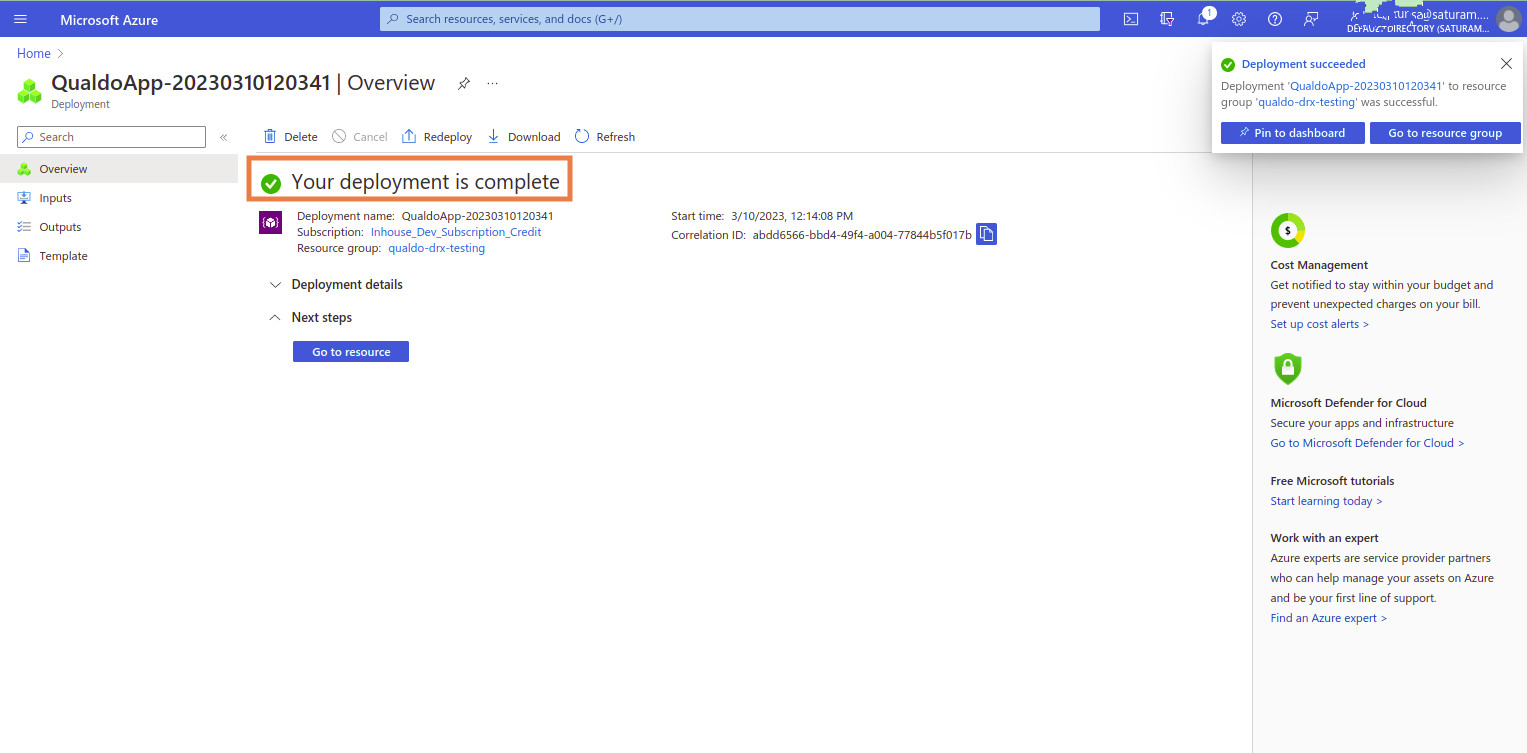
To enable access, import the Qualdo firewall's trusted certificate into your browser’s Trusted Root store. Ensure you connect to Qualdo via the designated DNS URL to complete the secure TLS handshake.